
Smart Home Automation

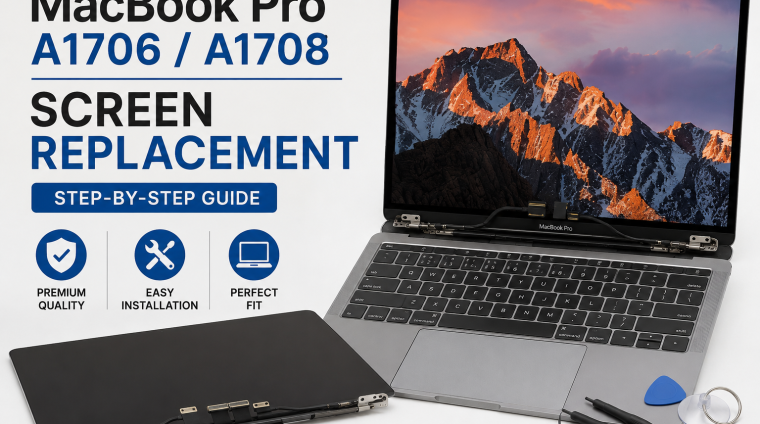
Mastering MacBook Pro 13-Inch Display Replacement: A1706/A1708 Display Assembly Repair
Learn how to safely replace the complete display assembly on compatible 13-inch MacBook Pro models through a structured, step-by-step repair process. This comprehensive course focuses primarily on the A1706 MacBook Pro with Touch Bar while clearly identifying the important differences that apply to the A1708 non-Touch Bar model.
What This Course Teaches
This course guides students through the complete display-assembly replacement process—from confirming the correct MacBook model and purchasing compatible replacement parts to disassembly, display removal, installation, reassembly and final testing.
Students will learn how to:
- Identify A1706 and A1708 MacBook Pro models correctly
- Determine whether display repair or replacement is appropriate
- Select a compatible replacement display assembly
- Prepare an organized, ESD-conscious repair workspace
- Use Pentalobe and Torx drivers, spudgers, opening picks, tweezers and other repair tools
- Reduce battery-related risk before beginning the repair
- Disable Auto Boot when required
- Remove the lower case without damaging its clips
- Disconnect the battery safely
- Identify and disconnect sensitive display and antenna components
- Remove hinge fasteners while controlling the display assembly
- Separate the damaged display from the MacBook enclosure
- Install, position and align the replacement display
- Reconnect cables without damaging connectors or surrounding components
- Organize and reinstall screws in their correct locations
- Reassemble the MacBook in the proper sequence
- Test the display, brightness controls, camera, Wi-Fi, Bluetooth, sleep behavior and overall operation
- Diagnose common problems discovered after reassembly
Who This Course Serves
This course is designed for:
- MacBook owners who want to replace a damaged display assembly
- Complete repair beginners who want detailed instruction
- Electronics and computer-repair hobbyists
- Students developing practical device-repair skills
- Technicians in training
- Independent repair professionals expanding their knowledge
- Refurbishers working with 2016 and 2017 MacBook Pro models
- Anyone who wants to understand the complete A1706 or A1708 display-replacement process before attempting the repair
Skills Students Will Develop
Students will develop practical skills in model verification, repair preparation, tool selection, screw management, ESD-conscious handling, connector identification, delicate cable disconnection, controlled disassembly and accurate reassembly.
They will also learn how to support the display during hinge removal, protect fragile internal components, align a replacement assembly and complete a systematic post-repair inspection. These skills can provide a strong foundation for other laptop and consumer-electronics repair projects.
Major Products and Applications Covered
The course covers:
- Apple MacBook Pro 13-inch A1706 with Touch Bar
- Apple MacBook Pro 13-inch A1708 without Touch Bar
- Compatible complete replacement display assemblies
- macOS functions used during preparation and final testing
- Auto Boot configuration
- Built-in display, brightness, camera, wireless-connectivity and sleep testing
- P5 Pentalobe and T3, T5 and T8 Torx drivers
- Spudgers, opening picks, suction handles and precision tweezers
- Magnetic repair mats and screw organizers
- Soft, clean and ESD-conscious work surfaces
Prerequisites
No previous MacBook repair experience is required. The course begins with model identification, preparation, tools and essential safety practices before advancing into the repair itself.
Students should have:
- A compatible A1706 or A1708 MacBook Pro
- A compatible replacement display assembly
- The required precision tools
- A clean, stable and well-lit workspace
- A reliable method for organizing screws
- Patience and the ability to work carefully with small connectors and delicate cables
- A willingness to follow every procedure in the correct order
Students should watch the relevant lessons completely before beginning each physical stage of the repair.
Course Structure
The course follows the same sequence as the actual repair:
- Course orientation, model verification and repair readiness
- Tool, replacement-part and workspace preparation
- Battery, Auto Boot and electrical-safety precautions
- Lower-case removal and initial internal access
- Battery isolation and component protection
- Antenna-system and cable disconnection
- Display-cable and connector removal
- Hinge release and damaged-display removal
- Replacement-display installation and alignment
- Reassembly, operational testing and troubleshooting
Lessons combine explanations, component identification, practical demonstrations, safety reminders and repair checkpoints. This progressive structure allows students to understand what they are doing, why each step matters and what should be verified before moving forward.
Expected Outcome
By the end of the course, students will understand how to complete a full display-assembly replacement on a compatible 13-inch A1706 or A1708 MacBook Pro using an organized and repeatable repair process.
Students should be able to prepare the computer safely, remove the damaged display, install and align a compatible replacement assembly, reassemble the MacBook and perform the necessary post-repair tests. The goal is to complete the repair carefully and confidently while minimizing the risk of cable damage, misplaced fasteners, alignment problems and avoidable rework.
- 12 Sections
- 4 Lessons
- Lifetime
- Section 1. Understanding the RepairThis section introduces the MacBook Pro A1706 and A1708 display replacement process and explains exactly what will be replaced during the repair. Students will learn how to confirm the correct MacBook model, determine whether Apple service options should be considered before beginning, and understand the major risks involved in replacing a complete display assembly. By the end of this section, students will know whether they have the correct machine, replacement part, tools, and expectations before proceeding.4
- Section 2. Safety, Workspace, and Pre Repair SetupThis section focuses on preparing the MacBook, replacement display, tools, and workspace before disassembly begins. Students will learn how to disable Auto Boot, organize a safe and clean work area, protect delicate components from damage, and properly handle the replacement display assembly. These preparation steps help reduce the risk of accidental power on, scratched components, damaged cables, lost screws, and other common repair problems.0
- Section 3. Remove the Lower CaseThis section walks students through the correct procedure for removing the MacBook Pro lower case. Students will learn how to remove the pentalobe screws, release the retaining clips, and carefully slide the lower case away from the chassis without bending or damaging it. Proper lower case removal provides safe access to the internal components required for the remainder of the display replacement.0
- Section 4. Disconnect the Battery SafelyThis section covers one of the most important safety procedures in the repair: disconnecting the MacBook Pro battery. Students will learn how to identify the battery connection area, disconnect the battery board data cable, and safely disconnect battery power before working around the display and logic board connections. Completing these steps helps protect both the technician and the MacBook from accidental electrical damage.0
- Section 5. Remove Display Cable Covers and Disconnect Display CablesThis section explains how to gain access to and disconnect the display-related cables. Students will remove the necessary hinge and cable covers, identify the display board flex cable, and safely disconnect the display connections without damaging the connectors or surrounding components. These procedures prepare the original display assembly for removal from the MacBook chassis.0
- Section 6. Remove the Antenna Cable AssemblyThis section focuses on the antenna assembly and coaxial cables located around the display hinge area. Students will learn how the antenna components are positioned, how to safely disconnect the small coax connectors, and how to remove the antenna assembly without damaging the cables or connectors. Careful handling is essential because these components affect Wi Fi and Bluetooth performance after the repair.0
- Section 7. Remove the Old Display AssemblyThis section guides students through the complete removal of the damaged or defective display assembly. Students will learn how to free the display cables, correctly position the MacBook for hinge removal, remove the hinge screws, and safely separate the display from the lower chassis. Proper support and positioning techniques are emphasized to prevent damage to the hinges, enclosure, or internal components.0
- Section 8. Install the Replacement Display AssemblyThis section covers installation and alignment of the replacement MacBook Pro display assembly. Students will compare the original and replacement displays, insert the hinges into the chassis, partially tighten the hinge screws, and carefully check screen alignment before final tightening. Correct alignment is critical for smooth lid movement, proper spacing, and professional repair results.0
- Section 9. Reassemble the Display Cables and Antenna AssemblyThis section walks students through reconnecting the components associated with the newly installed display. Students will reinstall the display cable assembly and antenna assembly, reconnect the coaxial antenna cables, and reconnect the display flex cables. Attention is given to connector alignment and cable routing so the MacBook can operate correctly after reassembly.0
- Section 10. Reconnect the Battery and Reinstall the Lower CaseThis section completes the main hardware reassembly process. Students will reconnect the battery power connector, reconnect the battery board data cable, and reinstall the MacBook Pro lower case. The section emphasizes proper connector seating, cable placement, clip engagement, and screw installation so the MacBook is safely and securely reassembled before testing.0
- Section 11. First Power On, Testing, and TroubleshootingThis section covers the critical testing process after the display replacement is complete. Students will perform the first power on, re enable Auto Boot, verify display operation, and check Wi Fi, Bluetooth, screen behavior, and other important functions. The section also addresses common problems such as a black screen or wireless connectivity issues and provides a final quality control process to confirm that the repair was successful.0
- Section 12. Final Course ProjectThis final section brings the entire MacBook Pro A1706 and A1708 display replacement process together. Students will complete a final repair checklist covering disassembly, display installation, cable reconnection, battery reconnection, reassembly, testing, and quality control. The goal is to confirm that students can perform the complete repair process systematically, safely, and with confidence from start to finish.0
